As a supplier of Bottom Bracket Shells, I often get asked by cyclists, bike builders, and enthusiasts about how to determine if a bottom bracket shell is the right size for their bike. It's a crucial question because the bottom bracket shell is a fundamental part of the bicycle frame, housing the bottom bracket and connecting the crankset to the frame. A poorly sized bottom bracket shell can lead to a host of problems, from inefficient power transfer to premature wear and tear. In this blog post, I'll guide you through the process of identifying the correct size for your bottom bracket shell.
Understanding the Basics of Bottom Bracket Shells
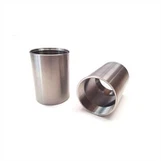
Before we dive into the sizing process, let's briefly understand what a bottom bracket shell is and its role in a bicycle. The bottom bracket shell is a cylindrical tube located at the lowest part of the bicycle frame, between the chainstays and down tube. It serves as the mounting point for the bottom bracket, which in turn supports the crankset. The crankset is the part of the bike that you pedal, and it includes the chainrings and the crank arms.
The size of the bottom bracket shell is defined by two main measurements: the internal diameter and the shell width. The internal diameter is the measurement across the inside of the tube, and it determines the type of bottom bracket that can be installed. The shell width is the distance between the inner faces of the shell, and it affects the compatibility with different types of cranksets.
Measuring the Internal Diameter
The first step in determining if your bottom bracket shell is the right size is to measure its internal diameter. You can do this using a caliper, which is a precision measuring tool that can give you an accurate reading. Here's how you can measure the internal diameter:
- Clean the Shell: Before taking any measurements, make sure the inside of the bottom bracket shell is clean and free of dirt, grease, or debris. This will ensure an accurate measurement.
- Open the Caliper: Open the caliper jaws wide enough to fit inside the bottom bracket shell.
- Insert the Caliper: Gently insert the caliper into the shell, making sure the jaws are parallel to the sides of the shell.
- Take the Measurement: Close the caliper jaws until they touch the opposite sides of the shell. Read the measurement on the caliper display.
Common internal diameters for bottom bracket shells include 34mm, 30mm, 24mm, and 22mm. Each of these diameters corresponds to a specific type of bottom bracket. For example, a 34mm diameter is typically used for Press Fit 30 bottom brackets, while a 24mm diameter is common for threaded bottom brackets.
Measuring the Shell Width
The next step is to measure the shell width. This measurement is taken from the inside face of one side of the shell to the inside face of the other side. You can use a ruler or a caliper to measure the shell width. Here's how:
- Position the Measuring Tool: Place the ruler or caliper across the inside of the bottom bracket shell, making sure it is perpendicular to the sides of the shell.
- Take the Measurement: Read the measurement where the ruler or caliper touches the inside faces of the shell.
Common shell widths include 68mm, 73mm, and 86.5mm. The shell width is important because it affects the compatibility with different types of cranksets. For example, a narrower shell width may require a shorter crank axle, while a wider shell width may accommodate a longer axle.
Matching the Bottom Bracket Shell Size to the Bottom Bracket and Crankset
Once you have measured the internal diameter and the shell width of your bottom bracket shell, you need to match these measurements to the specifications of the bottom bracket and crankset you plan to use. Here are some general guidelines:
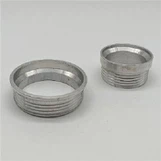
- Threaded Bottom Brackets: If you have a threaded bottom bracket shell, the internal diameter will typically be 24mm or 22mm. You will need to choose a threaded bottom bracket that matches the internal diameter of your shell. The shell width will also need to match the width specified by the crankset manufacturer.
- Press Fit Bottom Brackets: Press Fit bottom brackets come in a variety of internal diameters, including 34mm, 30mm, and 24mm. You will need to choose a Press Fit bottom bracket that matches the internal diameter of your shell. The shell width will again need to match the width specified by the crankset manufacturer.
- External Cup Bottom Brackets: External Cup bottom brackets have a larger external diameter and are typically used with mountain bikes. The internal diameter of the bottom bracket shell for External Cup bottom brackets is usually 24mm. The shell width will need to match the width specified by the crankset manufacturer.
Compatibility with Different Frame Materials
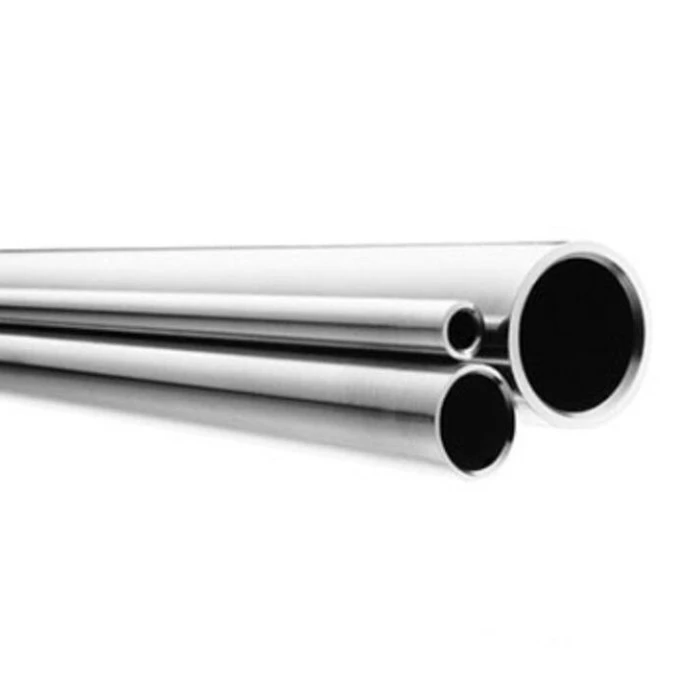
It's also important to consider the compatibility of the bottom bracket shell with different frame materials. For example, Titainium Gr9 Seamless Tubing is a popular choice for high-end bicycle frames due to its strength and lightweight properties. When using a titanium frame, you may need to choose a bottom bracket shell that is specifically designed for titanium frames.
Similarly, if you are using a carbon fiber frame, you will need to make sure the bottom bracket shell is compatible with the carbon fiber material. Some carbon fiber frames may require a special type of bottom bracket shell that is designed to prevent damage to the carbon fiber.

Using Headset Spacers for Adjustment
In some cases, you may need to use Titanium Headset Spacer to adjust the fit of the bottom bracket shell. Headset spacers can be used to fill in any gaps between the bottom bracket and the shell, ensuring a secure and stable fit.
When using headset spacers, make sure they are the correct size and thickness for your bottom bracket shell. You can consult the manufacturer's specifications or seek advice from a professional bike mechanic to determine the appropriate headset spacers for your needs.
Checking for Wear and Damage
Before installing a new bottom bracket, it's important to check the bottom bracket shell for wear and damage. Look for signs of cracking, deformation, or excessive wear on the inside of the shell. If you notice any damage, it's best to replace the bottom bracket shell to ensure the safety and performance of your bike.
Choosing the Right Bottom Bracket Shell for Your Bike
If you are in the market for a new bottom bracket shell, there are several factors to consider. First, make sure the shell size matches the specifications of your bottom bracket and crankset. Second, consider the frame material and choose a shell that is compatible with it. Third, look for a high-quality bottom bracket shell that is made from durable materials.
At our company, we offer a wide range of Bottom Bracket Shells in different sizes and materials to meet the needs of cyclists and bike builders. Our bottom bracket shells are precision-engineered to ensure a perfect fit and optimal performance.
Contact Us for Procurement and Consultation
If you have any questions about choosing the right bottom bracket shell for your bike or if you are interested in purchasing our products, we encourage you to contact us. Our team of experts is available to provide you with personalized advice and assistance. We look forward to working with you to ensure your bike has the perfect bottom bracket shell for a smooth and efficient ride.
References
- Bicycle Mechanics' Handbook, by Park Tool Company
- The Bicycle Design Book, by Grant Petersen