As a supplier of Bicycle Seatpost Clamps, I often receive inquiries from cyclists and bike enthusiasts about the optimal tightness for a bicycle seatpost clamp. This is a crucial question because getting the tightness right can significantly impact both the safety and comfort of your cycling experience. In this blog post, I'll delve into the science behind tightening a bicycle seatpost clamp, share some practical tips, and highlight the importance of choosing the right clamp for your needs.
Understanding the Function of a Bicycle Seatpost Clamp
Before we discuss how tight to tighten a seatpost clamp, it's essential to understand its function. A Bicycle Seatpost Clamp is a device that secures the seatpost to the bicycle frame. It prevents the seatpost from slipping up or down while you're riding, ensuring that your seat remains at a consistent height. Additionally, it helps maintain the proper angle of the seat, which is crucial for your comfort and pedaling efficiency.
The Consequences of Over - Tightening
Over - tightening a seatpost clamp can lead to several problems. First, it can damage the seatpost or the frame. Most seatposts are made of materials like aluminum, carbon fiber, or titanium, and excessive force can cause them to crack or deform. Carbon fiber seatposts, in particular, are very sensitive to over - tightening because they are brittle compared to metals.
If you damage the seatpost, you may need to replace it, which can be costly. Moreover, over - tightening can also distort the clamp itself, reducing its effectiveness over time. This can lead to the seatpost slipping even if the clamp is tightened to a high degree.
The Dangers of Under - Tightening
On the other hand, under - tightening a seatpost clamp is equally dangerous. If the clamp is not tight enough, the seatpost can slip while you're riding. This can be extremely hazardous, especially if you're cycling at high speeds or on rough terrain. A sudden change in seat height can throw off your balance, causing you to lose control of the bike and potentially leading to an accident.

How to Determine the Right Tightness
So, how do you find the sweet spot between over - tightening and under - tightening? Here are some steps you can follow:
Step 1: Check the Manufacturer's Recommendations
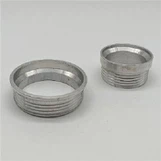
The first and most important step is to check the manufacturer's instructions for both the seatpost and the clamp. Different materials and designs have different torque specifications. For example, a Titanium Seat Collar may have different torque requirements compared to an Aluminum Seat Post Collar.
Manufacturers usually provide a recommended torque range in Newton - meters (Nm). You can use a torque wrench to ensure that you're tightening the clamp within this range. A torque wrench is a tool that allows you to apply a specific amount of force to a bolt or nut, ensuring consistent and accurate tightening.
Step 2: Clean and Lubricate
Before tightening the seatpost clamp, make sure the seatpost and the inside of the frame where it fits are clean. Remove any dirt, grime, or old lubricant. Then, apply a thin layer of lubricant to the seatpost. This helps prevent corrosion and makes it easier to adjust the seatpost in the future.
However, be careful not to over - lubricate, as excess lubricant can reduce the friction between the seatpost and the clamp, increasing the risk of slippage.
Step 3: Tighten Gradually
Start by tightening the clamp bolts or screws slightly. Then, check the seatpost to make sure it's secure. If it still moves, tighten the clamp a little more. Repeat this process in small increments until the seatpost is firmly in place but not overly tightened.
It's a good idea to test the seatpost's stability by applying some downward pressure on the seat. If it doesn't move, you're on the right track.
Step 4: Re - check Periodically
Even if you've tightened the seatpost clamp correctly, it's important to re - check its tightness periodically. Vibration from riding, changes in temperature, and normal wear and tear can cause the clamp to loosen over time. Make it a habit to check the seatpost clamp before every long ride or at least once a month.
Choosing the Right Bicycle Seatpost Clamp
Selecting the right seatpost clamp is just as important as tightening it correctly. There are several factors to consider when choosing a clamp:
Material
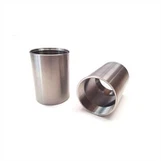
As mentioned earlier, seatpost clamps can be made from different materials, such as aluminum, titanium, and carbon fiber. Aluminum clamps are lightweight, affordable, and corrosion - resistant. Titanium clamps are even lighter and stronger, but they are more expensive. Carbon fiber clamps are the lightest option, but they are also the most brittle and require careful handling.
Design
There are various designs of seatpost clamps, including single - bolt, double - bolt, and quick - release clamps. Single - bolt clamps are simple and easy to use, but they may not provide as much clamping force as double - bolt clamps. Quick - release clamps are convenient for adjusting the seatpost height on the go, but they may not be as secure as bolt - type clamps.
Compatibility
Make sure the seatpost clamp you choose is compatible with your bicycle frame and seatpost. Check the diameter of the seatpost and the frame to ensure a proper fit.
Conclusion
In conclusion, tightening a bicycle seatpost clamp to the right degree is crucial for your safety and comfort while cycling. By following the manufacturer's recommendations, using a torque wrench, and tightening gradually, you can ensure that your seatpost remains secure without causing damage.
As a supplier of high - quality Bicycle Seatpost Clamps, we offer a wide range of options to suit different needs and budgets. Whether you're looking for an Aluminum Seat Post Collar for everyday use or a Titanium Seat Collar for a high - performance bike, we have the perfect solution for you.
If you're interested in purchasing our products or have any questions about seatpost clamps, please don't hesitate to contact us for procurement and negotiation. We're here to help you find the best seatpost clamp for your bicycle.

References
- "Bicycle Mechanics Manual" by Park Tool Company
- "The Bicycle: A History" by David V. Herlihy
- Manufacturer's instructions for various seatpost and clamp models